Natural Language Understanding (NLU)
When a user clicks the NLU project, the Overview sub-menu opens by default. The Configuration section will cover configuration.
Users interact with an application through its user interface. The user interface of the NLU project consists of the following sub-menus:
Overview
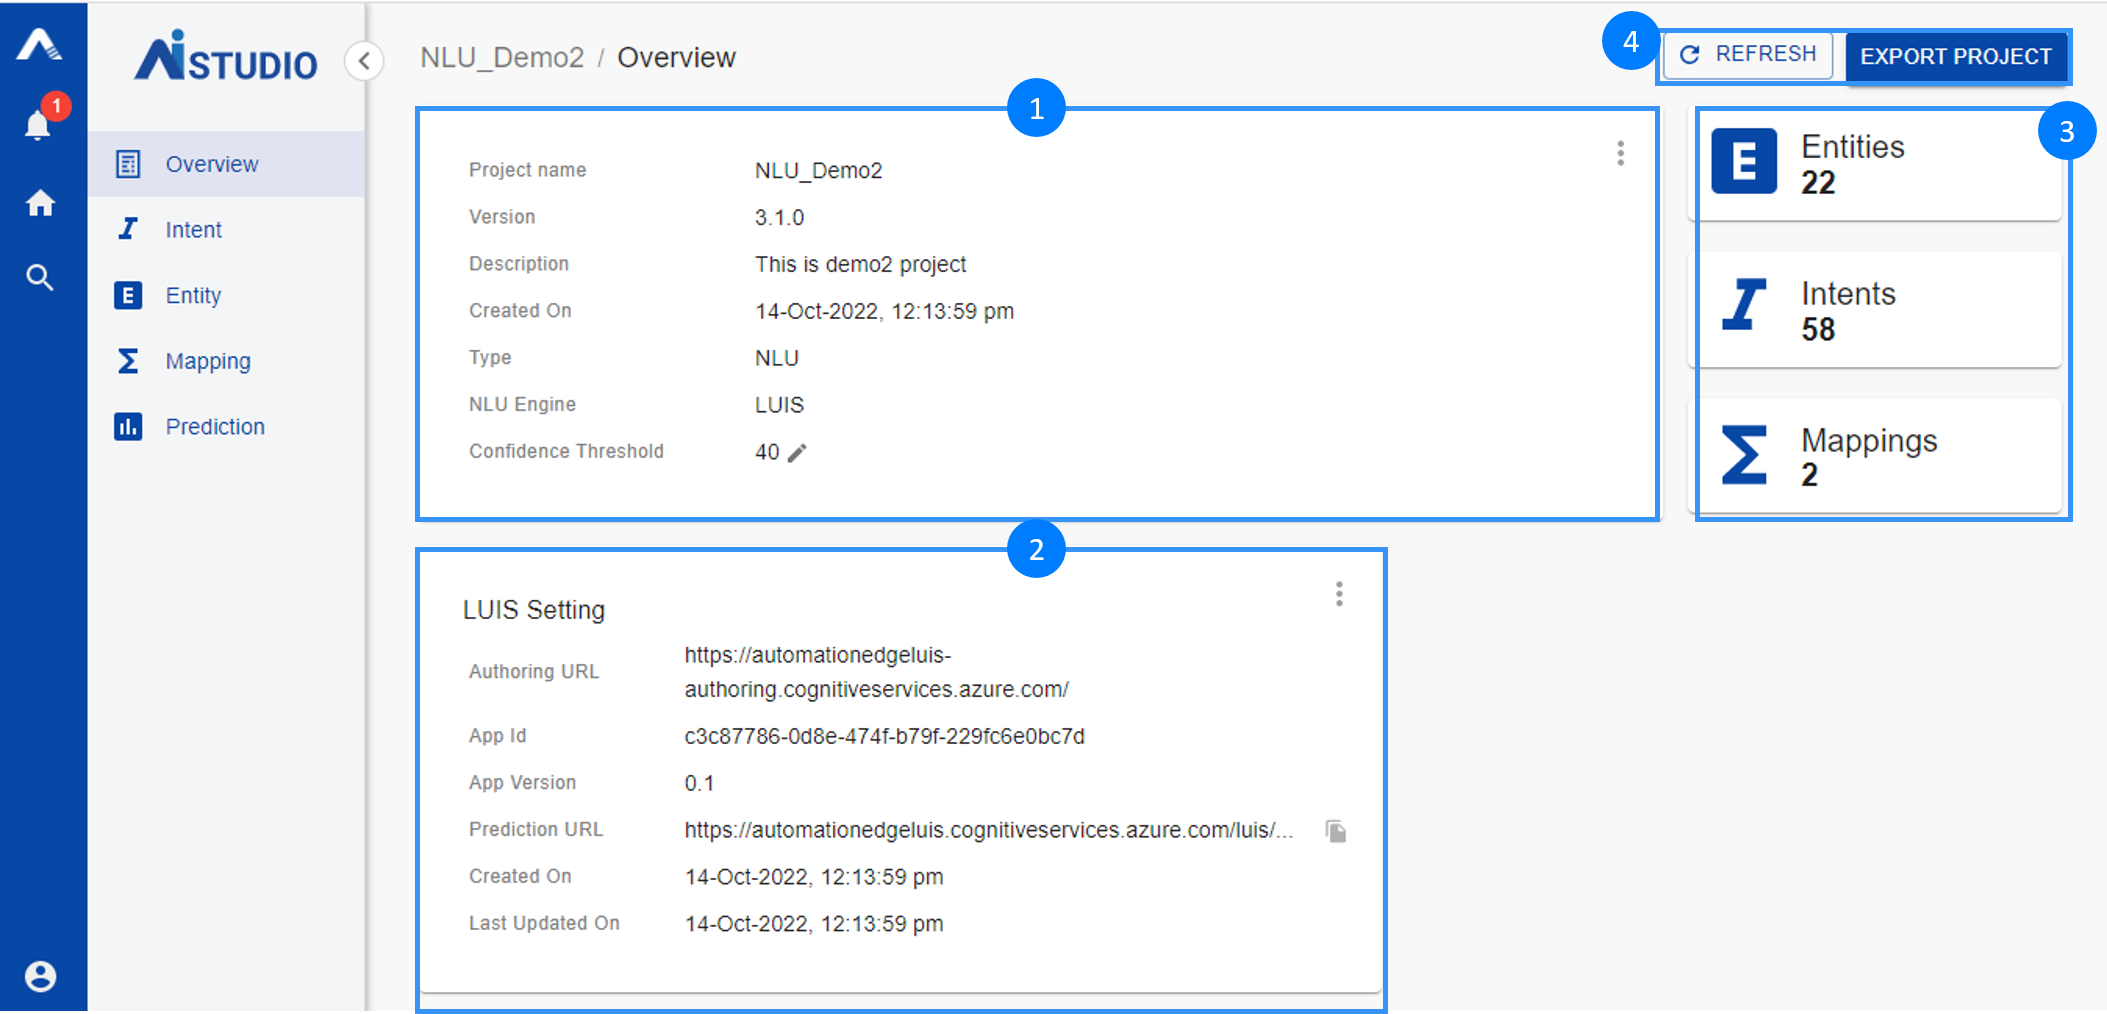
- Project Overview: It provides high-level details about the project such as the Project Name, Version, Description, Creation Date and Time, Engine Type, NLU Engine, and Confidence Threshold.
The Confidence Threshold is the level above which the prediction of final intent(s) will be displayed in the final output. For example, if the confidence level is 80, the top result that is greater than 80% will be included in the output; otherwise, the output is none. Users can edit or delete the project.
- LUIS Settings: It provides an interface to add, update or delete settings that allow AI Studio to connect to the user’s LUIS Conversation Application. For help with configuring LUIS settings, click here .
- AI Overview Panel: It provides numerical data about the AI aspects of the project in terms of Intent, Entities, and Mappings. (Explained in detail further.)
- Action Buttons: These buttons allow the user to
a. Refresh Project: Users can refresh the project to get the latest details from LUIS.
b. Export Project: Users can export their project which can then be imported and used in other AI Studio instances.
The screenshot of the overview page is given below:
Intent
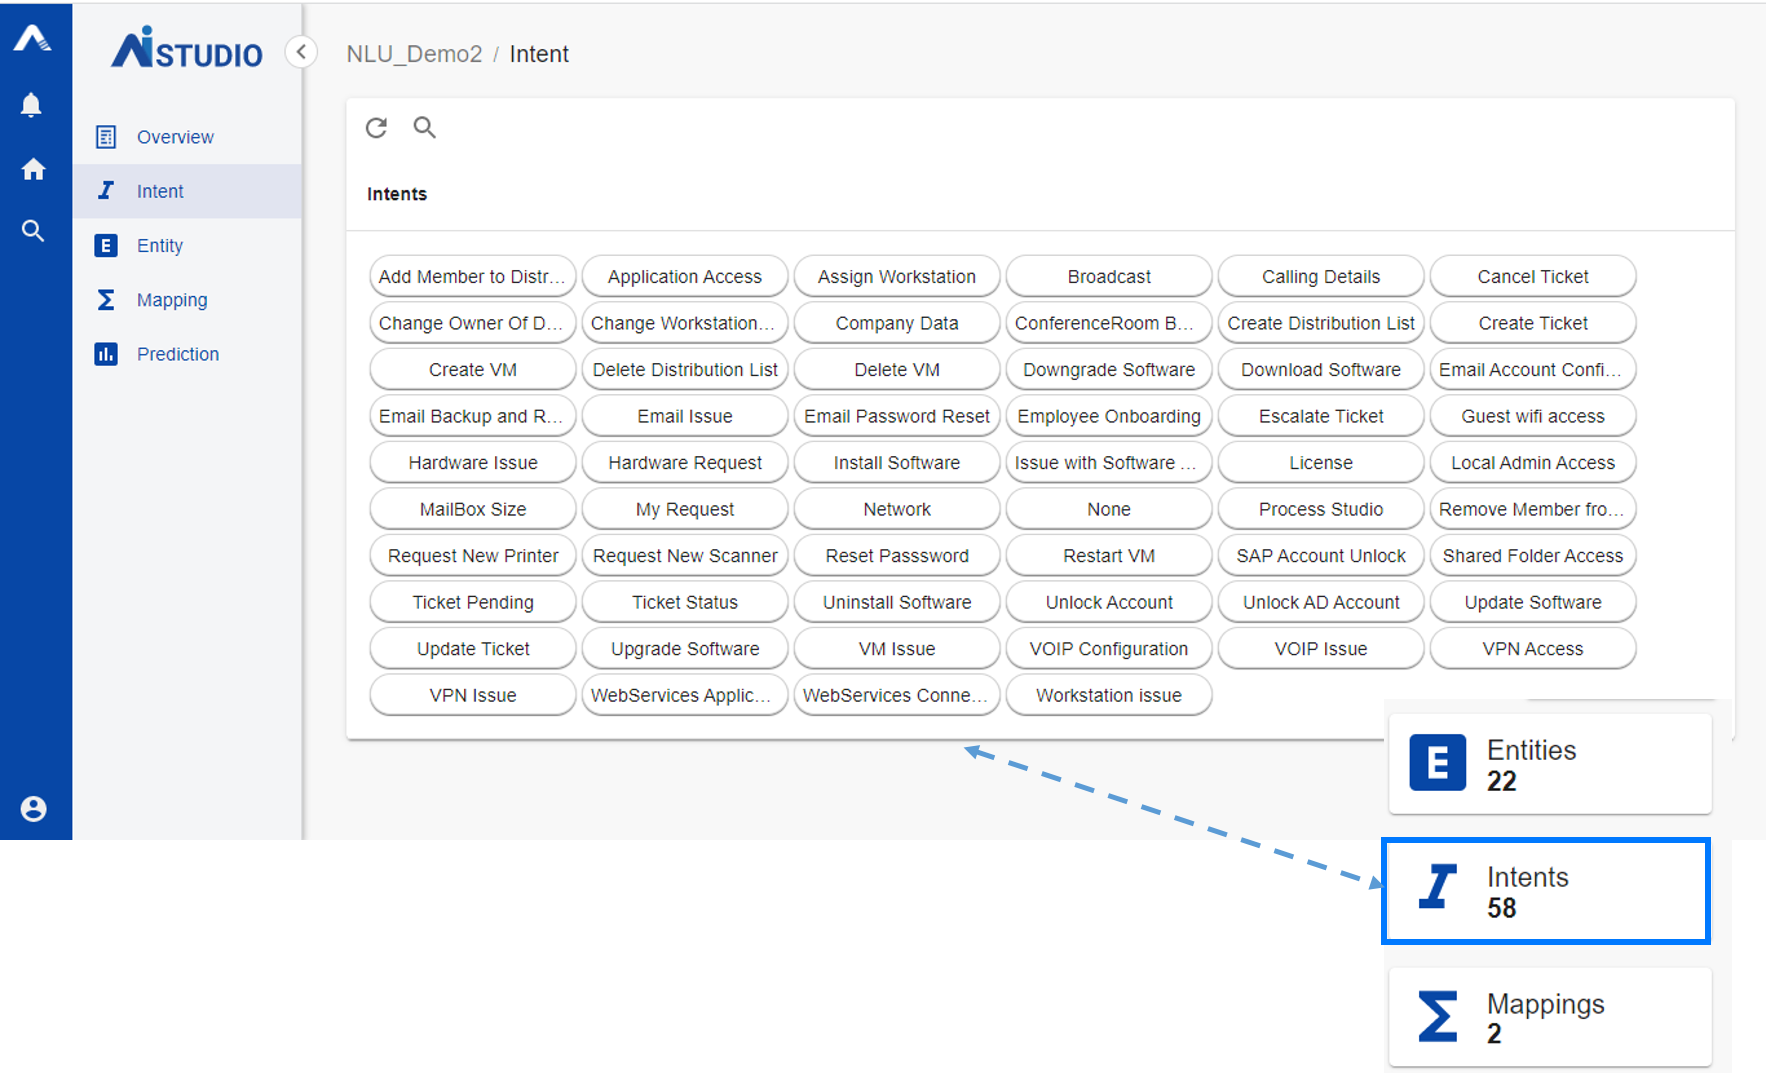
Intent sub-menu is used to manage the Intents related to the user’s specific NLU project. As the term implies, an "intent" is a desire to take action. A simple example of this is if a user says, "I want to book a hotel reservation, the intent can be "create a hotel reservation."
The Intents value found in the AI Overview panel in the Overview sub-menu displays the total number of intents visible on this page. The total number of intents seen on this page can be tallied back with the Intents value seen in the AI Overview panel in the Overview sub-menu.
Entity
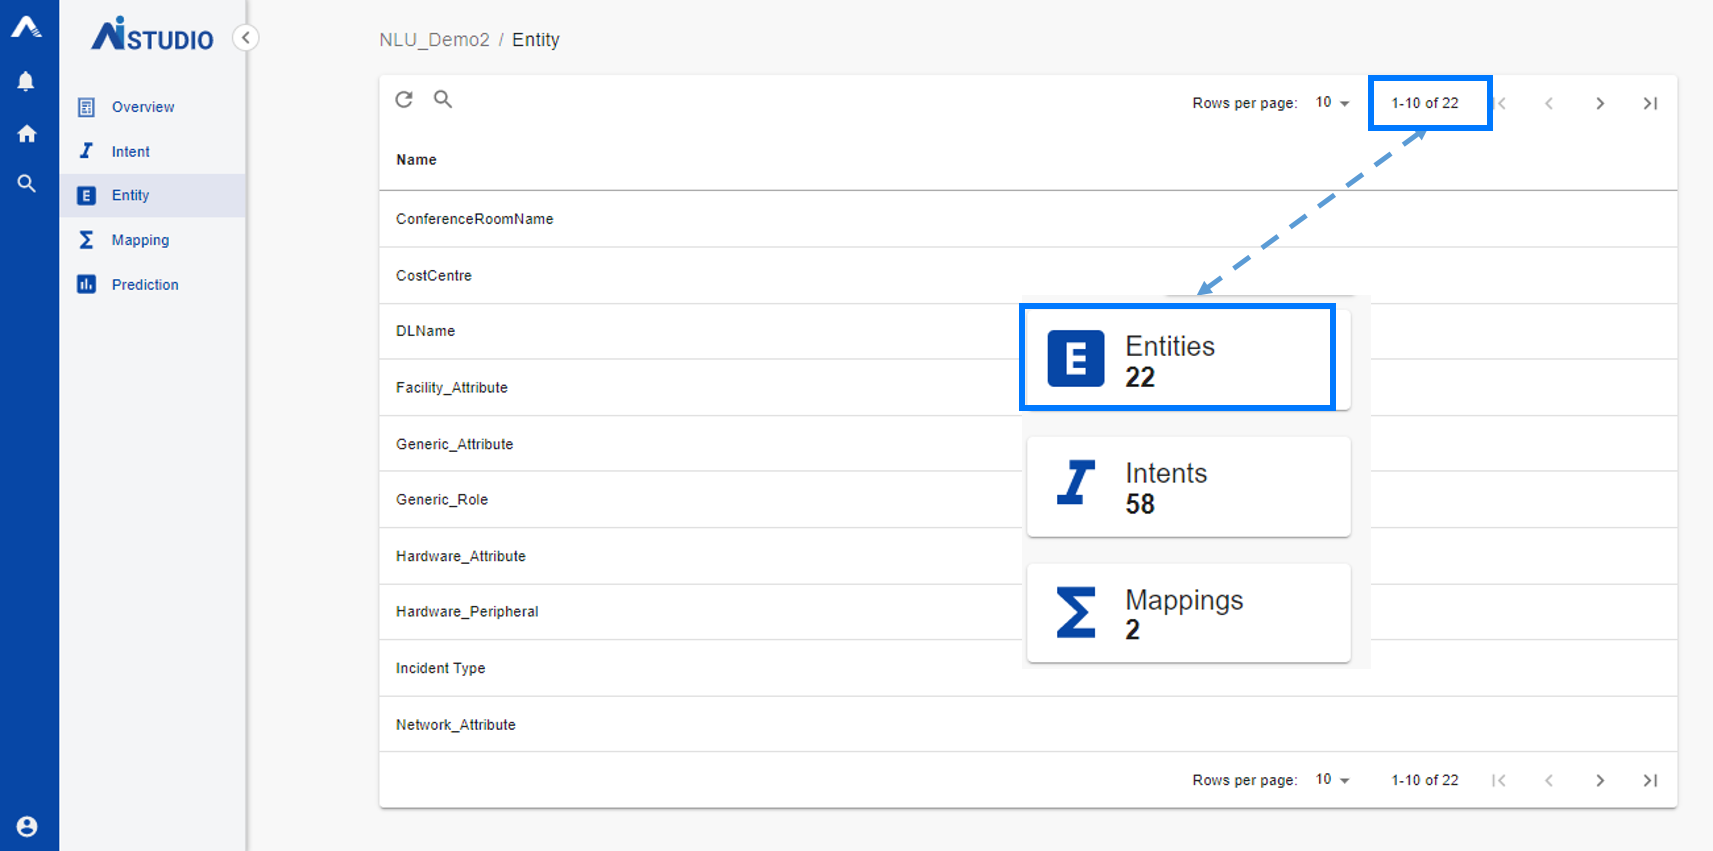
Entity sub-menu is used to manage the entities related to the user’s specific NLU project. Entities, in basic terms, can be described as the details required to fulfill an intent. To understand with an example, let us consider the same example from an earlier section about hotel reservations. In this case, when someone says, “I want to book a hotel”, the standard questions that follow will be which hotel, in which city, on what date, at what time, etc. These questions are nothing but entities – Hotel, City, Date, Time, etc.
To extend the existing example let us consider the sentence “I want to book Sheraton Grand in London for 2nd January at 8.30 AM ”. In this case,
| Intent | Entities |
|---|---|
| Make a hotel reservation | Hotel: Sheraton Grand |
| City: London | |
| Date: 2nd January | |
| Time: 8.30 AM |
The total number of entities seen on this page can be tallied back with the Entities value seen in the AI Overview panel in the Overview sub-menu.
Mapping
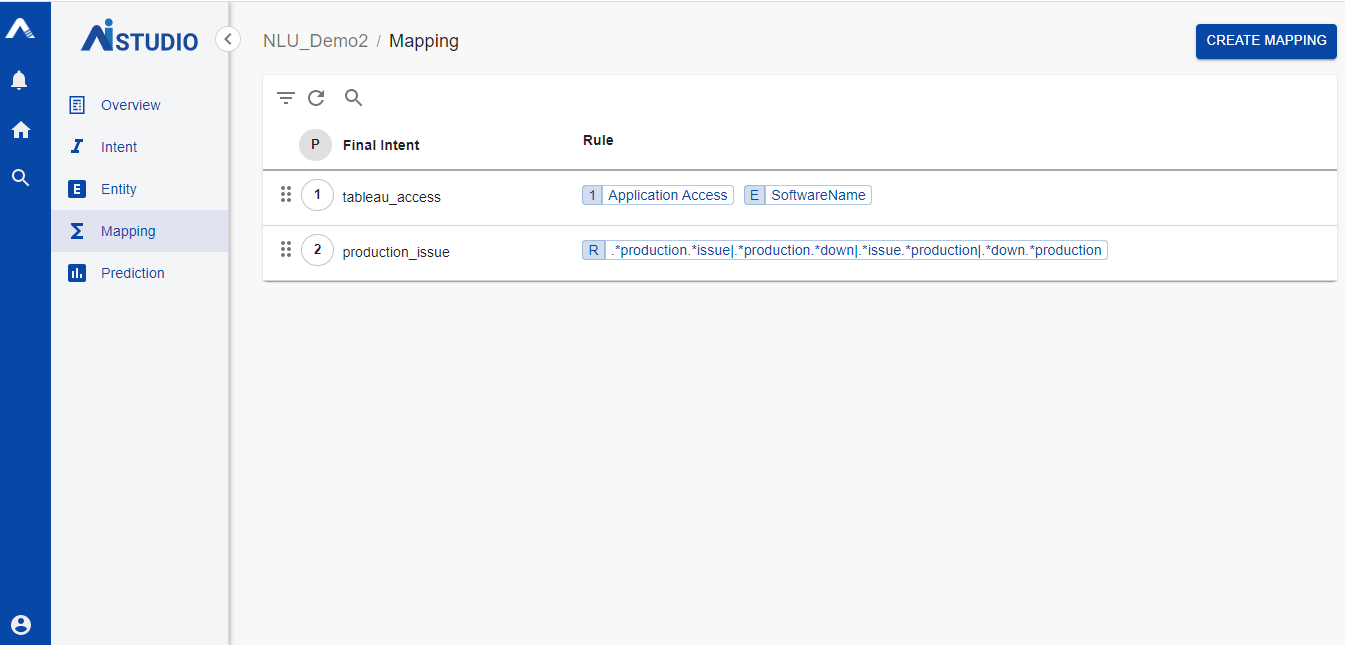
Mapping is the calculation of the final Intent based on the rules defined by selecting a set of Intents, Entities, and Regular Expressions.
Once the user clicks the Mapping sub-menu, the mapping screen is displayed as indicated in the screenshot below:
Create Mapping
The user can click the CREATE MAPPING button to create a new mapping. The rules for the new mapping are created using Intent, Entity, and/or Regular Expression. As indicated in the earlier image, the user enters the ‘Final Intent Name’, which is a mandatory field, and then creates different rules.
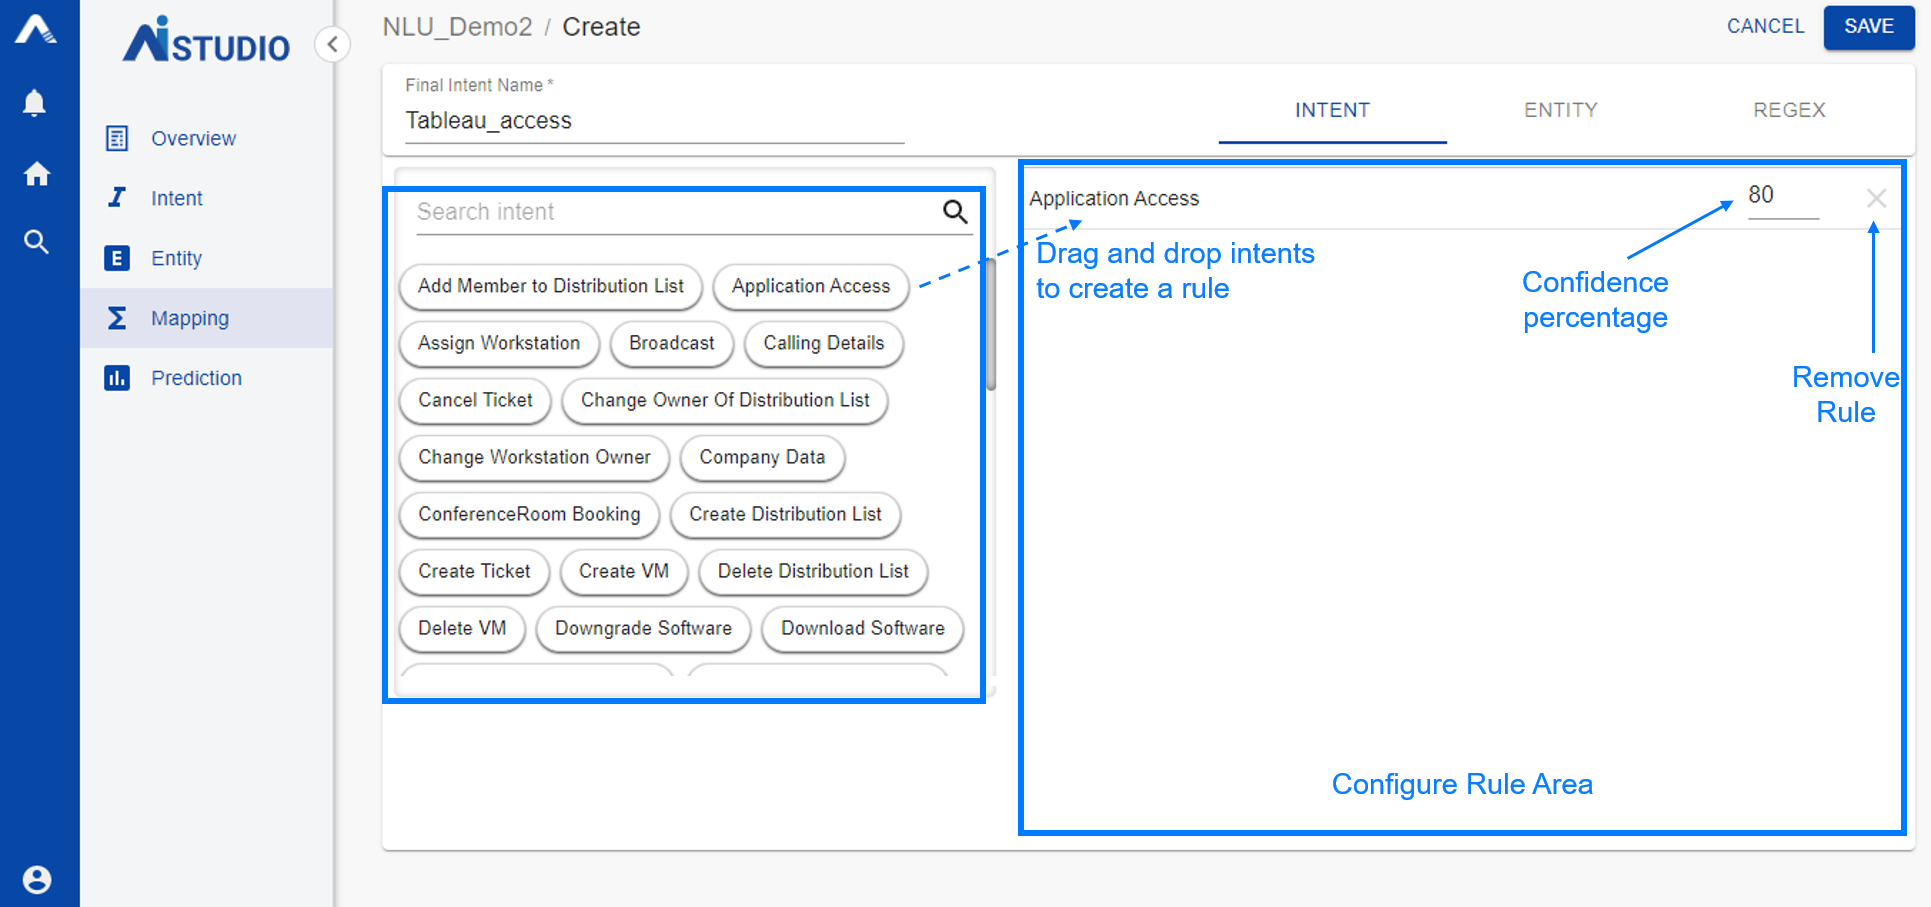
Intent Rule
The user can click the INTENT tab to configure the rule for intents. The user can select any intent from any category and drop it in the rule area. Once the user drops in the intent, the system would allow the user to configure the confidence from 10% to 100% for the prediction of the Final Intent. The user can remove an added sub-rule by clicking the cross icon. Users can add as many intents as required to create a rule. All intents with confidence levels are taken into consideration by the rule engine for predictions.
Entity Rule
When the user clicks the Entity tab, the screen is refreshed as indicated in the following screenshot:
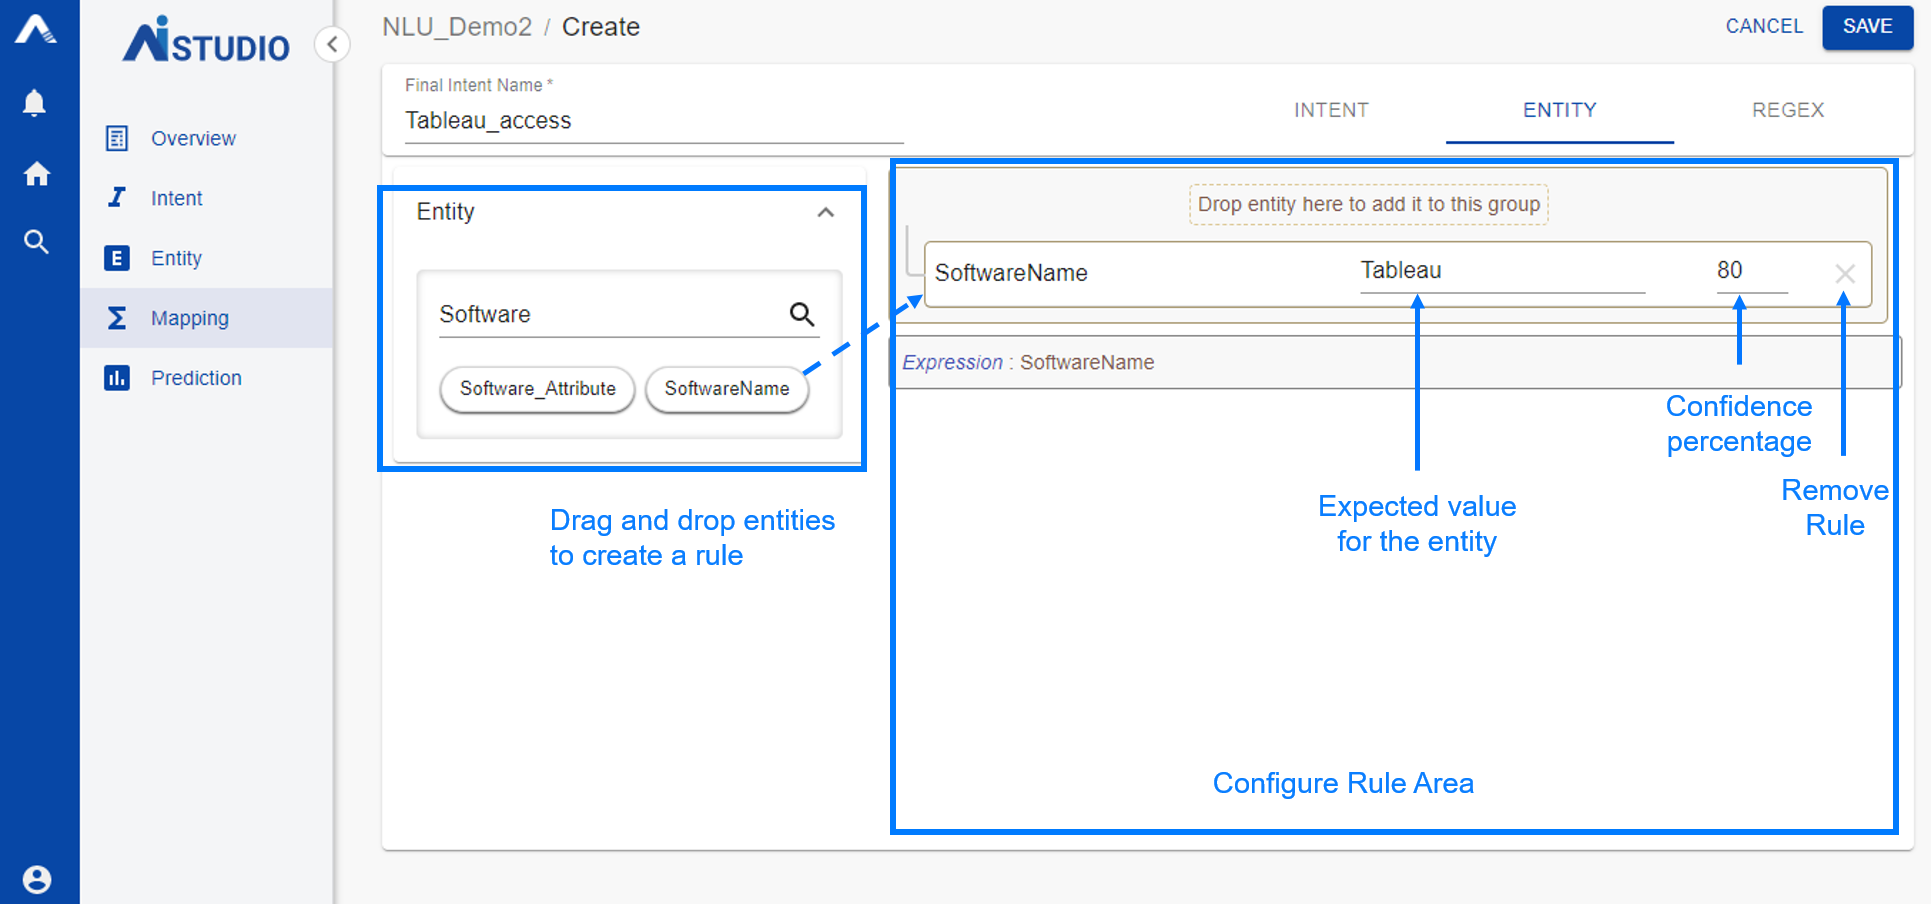
The user can select entities and drop them into the configure rule area. Additionally, the user can apply AND/OR logic to form an expression and assign value and confidence for each entity.
REGEX
A Regex, or Regular Expression, is a sequence of characters that forms a search pattern. Regex can be used to check if a text input contains the specified search pattern.
When the user clicks the Regex tab, the screen is refreshed to add regular expressions as part of the rule as indicated. If a mapping has a Regex rule, it is satisfied when the Regex pattern matches the prediction query itself. The user needs to enter the Regex pattern in the text box given and then test the text typed in the “Test Input” test box. When a user clicks the TEST button, the user is notified of Regex Pattern matching or not. If the test is successful then only the APPLY button is enabled. Once the user clicks the APPLY button, as indicated in the screenshot given below:
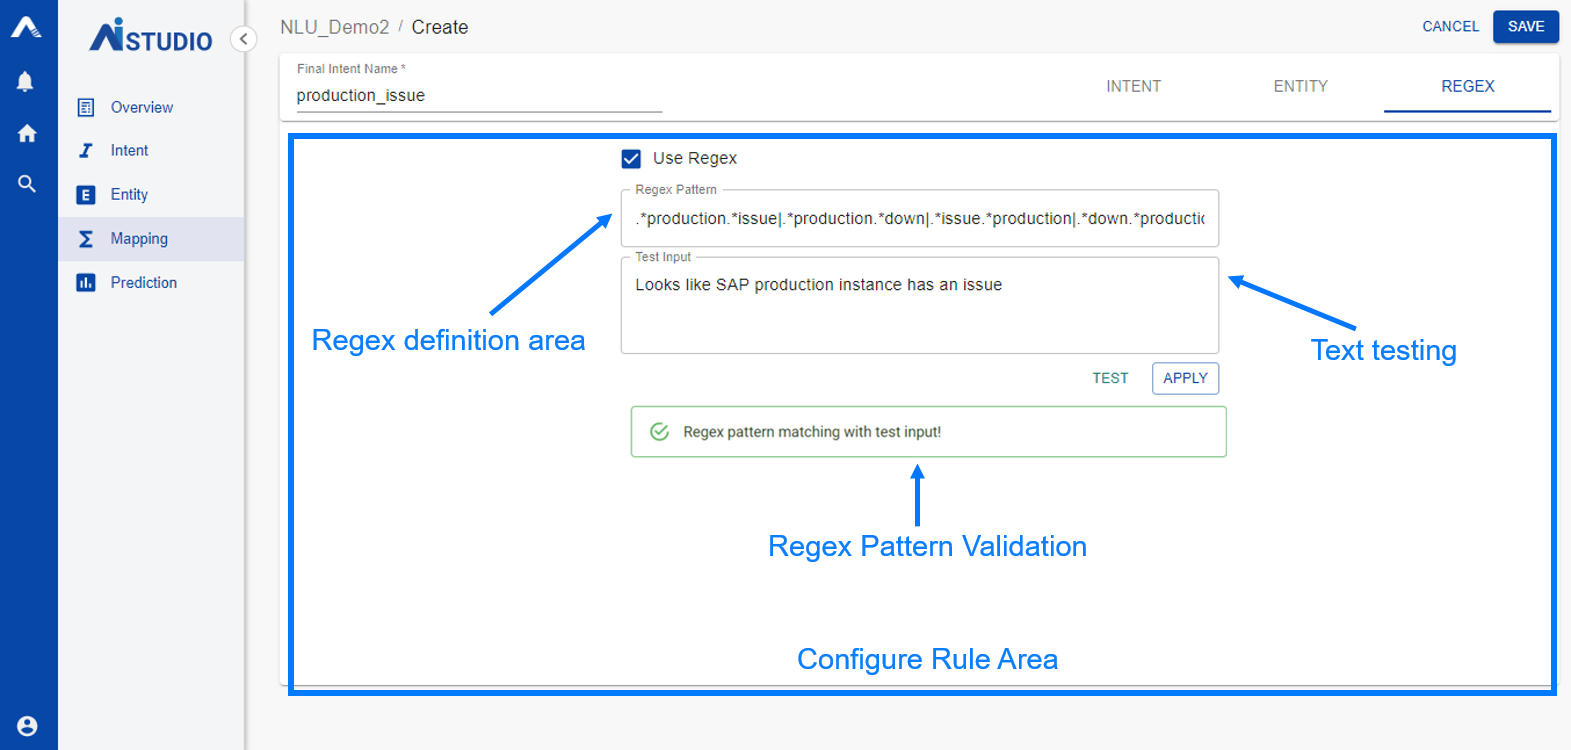
When the user clicks APPLY, the Regex Pattern is added to the rule and the message is displayed as “Regex Applied”.
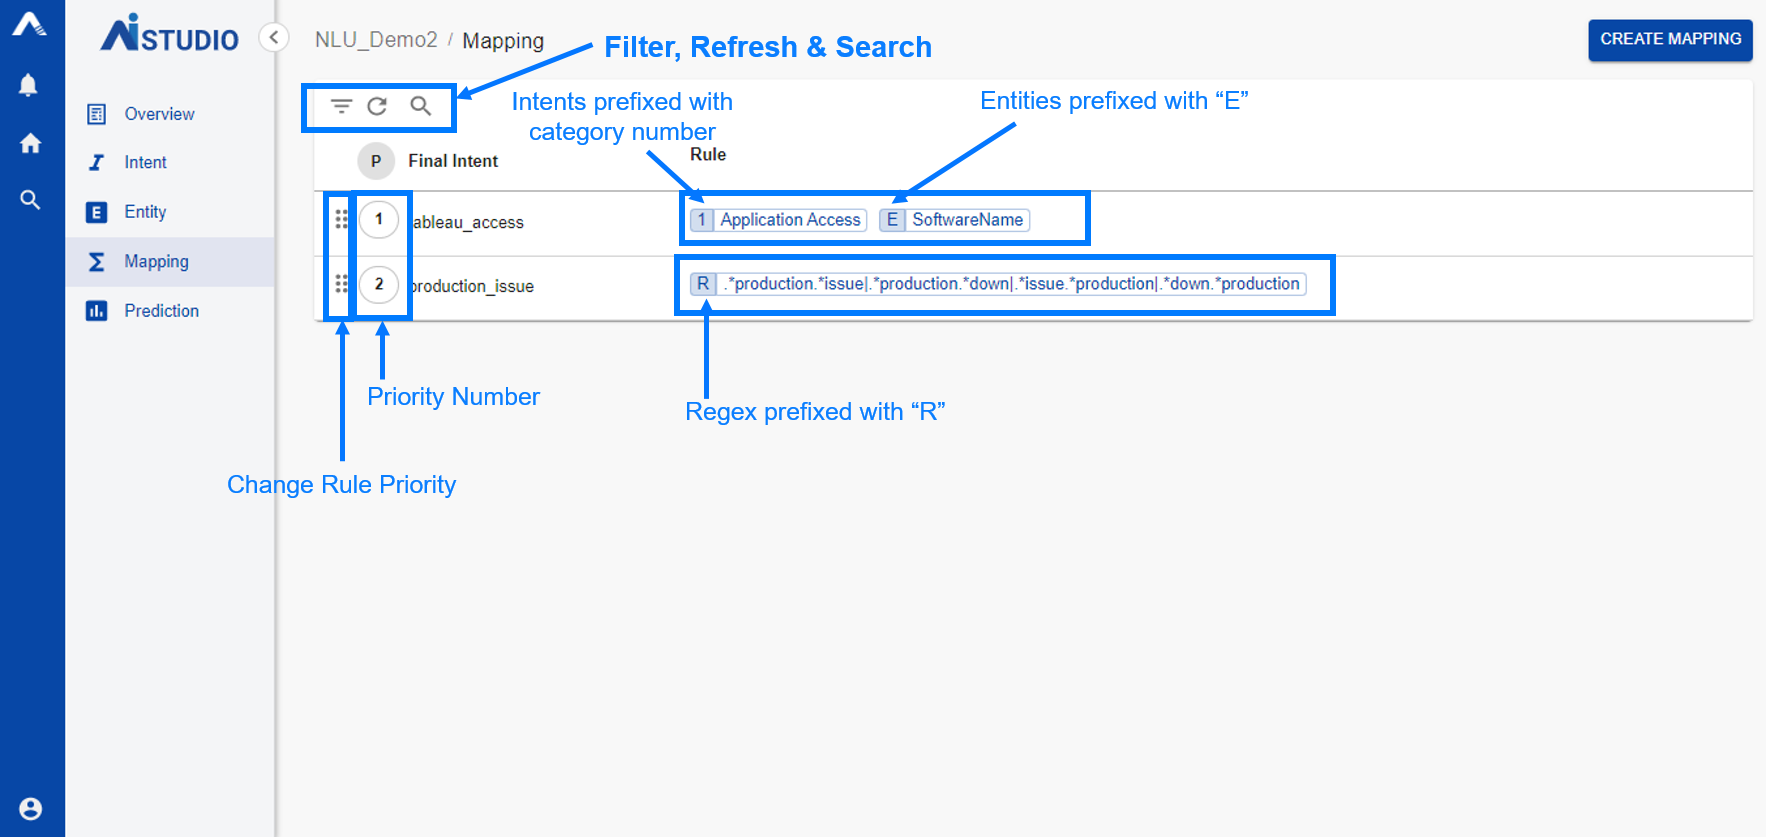
After adding Intents and/or Entities and/or REGEX, the user clicks the CREATE button. The user is notified with an alert of “Mapping created successfully!”. The user control comes back to the mapping screen with the mapping added to the list displayed. The mapping list has fields, ‘Priority Number’, ‘Final Intent Name’, ‘Rules’ - Intents prefixed with numbers, Entities Prefixed with ‘E’, and REGEX prefixed with ‘R’.
Filter Mapping
The mapping list can be filtered if the user clicks the filter (![]() ) icon to get the desired mapping list. Once the user clicks the filter icon, the Filters dialog is popped up. The user can select required Entities from the required category to filter and then click the APPLY button. Only the rules that contain the criteria filtered for will be displayed on the mapping screen. On clicking the CLEAR button, all the applied filters would be cleared and the mapping screen would display the rules without any filters applied.
) icon to get the desired mapping list. Once the user clicks the filter icon, the Filters dialog is popped up. The user can select required Entities from the required category to filter and then click the APPLY button. Only the rules that contain the criteria filtered for will be displayed on the mapping screen. On clicking the CLEAR button, all the applied filters would be cleared and the mapping screen would display the rules without any filters applied.
Search Mapping
The required mapping can be searched by clicking the search (![]() ) icon. The search provided is IntelliSense type and searches the final intent name with matching text typed in the search box.
) icon. The search provided is IntelliSense type and searches the final intent name with matching text typed in the search box.
Edit Mapping
The user can move the cursor on the right-hand corner of the mapping and click the edit (![]() ) icon. Once the user clicks the edit icon, the Edit Mapping screen is displayed. The user can modify the mapping. The steps to modify the mapping are the same as those used in creating the mapping.
) icon. Once the user clicks the edit icon, the Edit Mapping screen is displayed. The user can modify the mapping. The steps to modify the mapping are the same as those used in creating the mapping.
Delete Mapping
The user can find the delete(![]() ) icon in the mapping's right corner. The Delete Mapping dialog appears after the user clicks the delete icon, allowing users to confirm the deletion activity.
If the user clicks the NO button, the delete action is canceled. If the user clicks the YES button, the mapping is deleted and the alert messages “Mapping deleted successfully!” and “Mapping priority changed successfully!” are displayed. The mapping is removed from the list and the mapping’s priority is updated.
) icon in the mapping's right corner. The Delete Mapping dialog appears after the user clicks the delete icon, allowing users to confirm the deletion activity.
If the user clicks the NO button, the delete action is canceled. If the user clicks the YES button, the mapping is deleted and the alert messages “Mapping deleted successfully!” and “Mapping priority changed successfully!” are displayed. The mapping is removed from the list and the mapping’s priority is updated.
Change Priority of Mapping
The user can click the dots (![]() ) icon on the left of the mapping name, then drag and drop the mapping to the top or bottom to change its priority. The "Change Mapping Priority" dialog box appears, asking the user for confirmation before changing the priority of the mapping. If the user clicks “YES”, the selected mapping’s priority would change. The user is notified with an alert displaying “Mapping priorities changed successfully!” and the priority numbers of the mappings is also updated.
) icon on the left of the mapping name, then drag and drop the mapping to the top or bottom to change its priority. The "Change Mapping Priority" dialog box appears, asking the user for confirmation before changing the priority of the mapping. If the user clicks “YES”, the selected mapping’s priority would change. The user is notified with an alert displaying “Mapping priorities changed successfully!” and the priority numbers of the mappings is also updated.
Prediction
The Prediction sub-menu allows users to test how well their NLU setups are performing. This sub-menu is only meant to make it easier to test how well the Intent, Entity, and Mappings work. There are three main parts to this page as shown in the screenshot below:
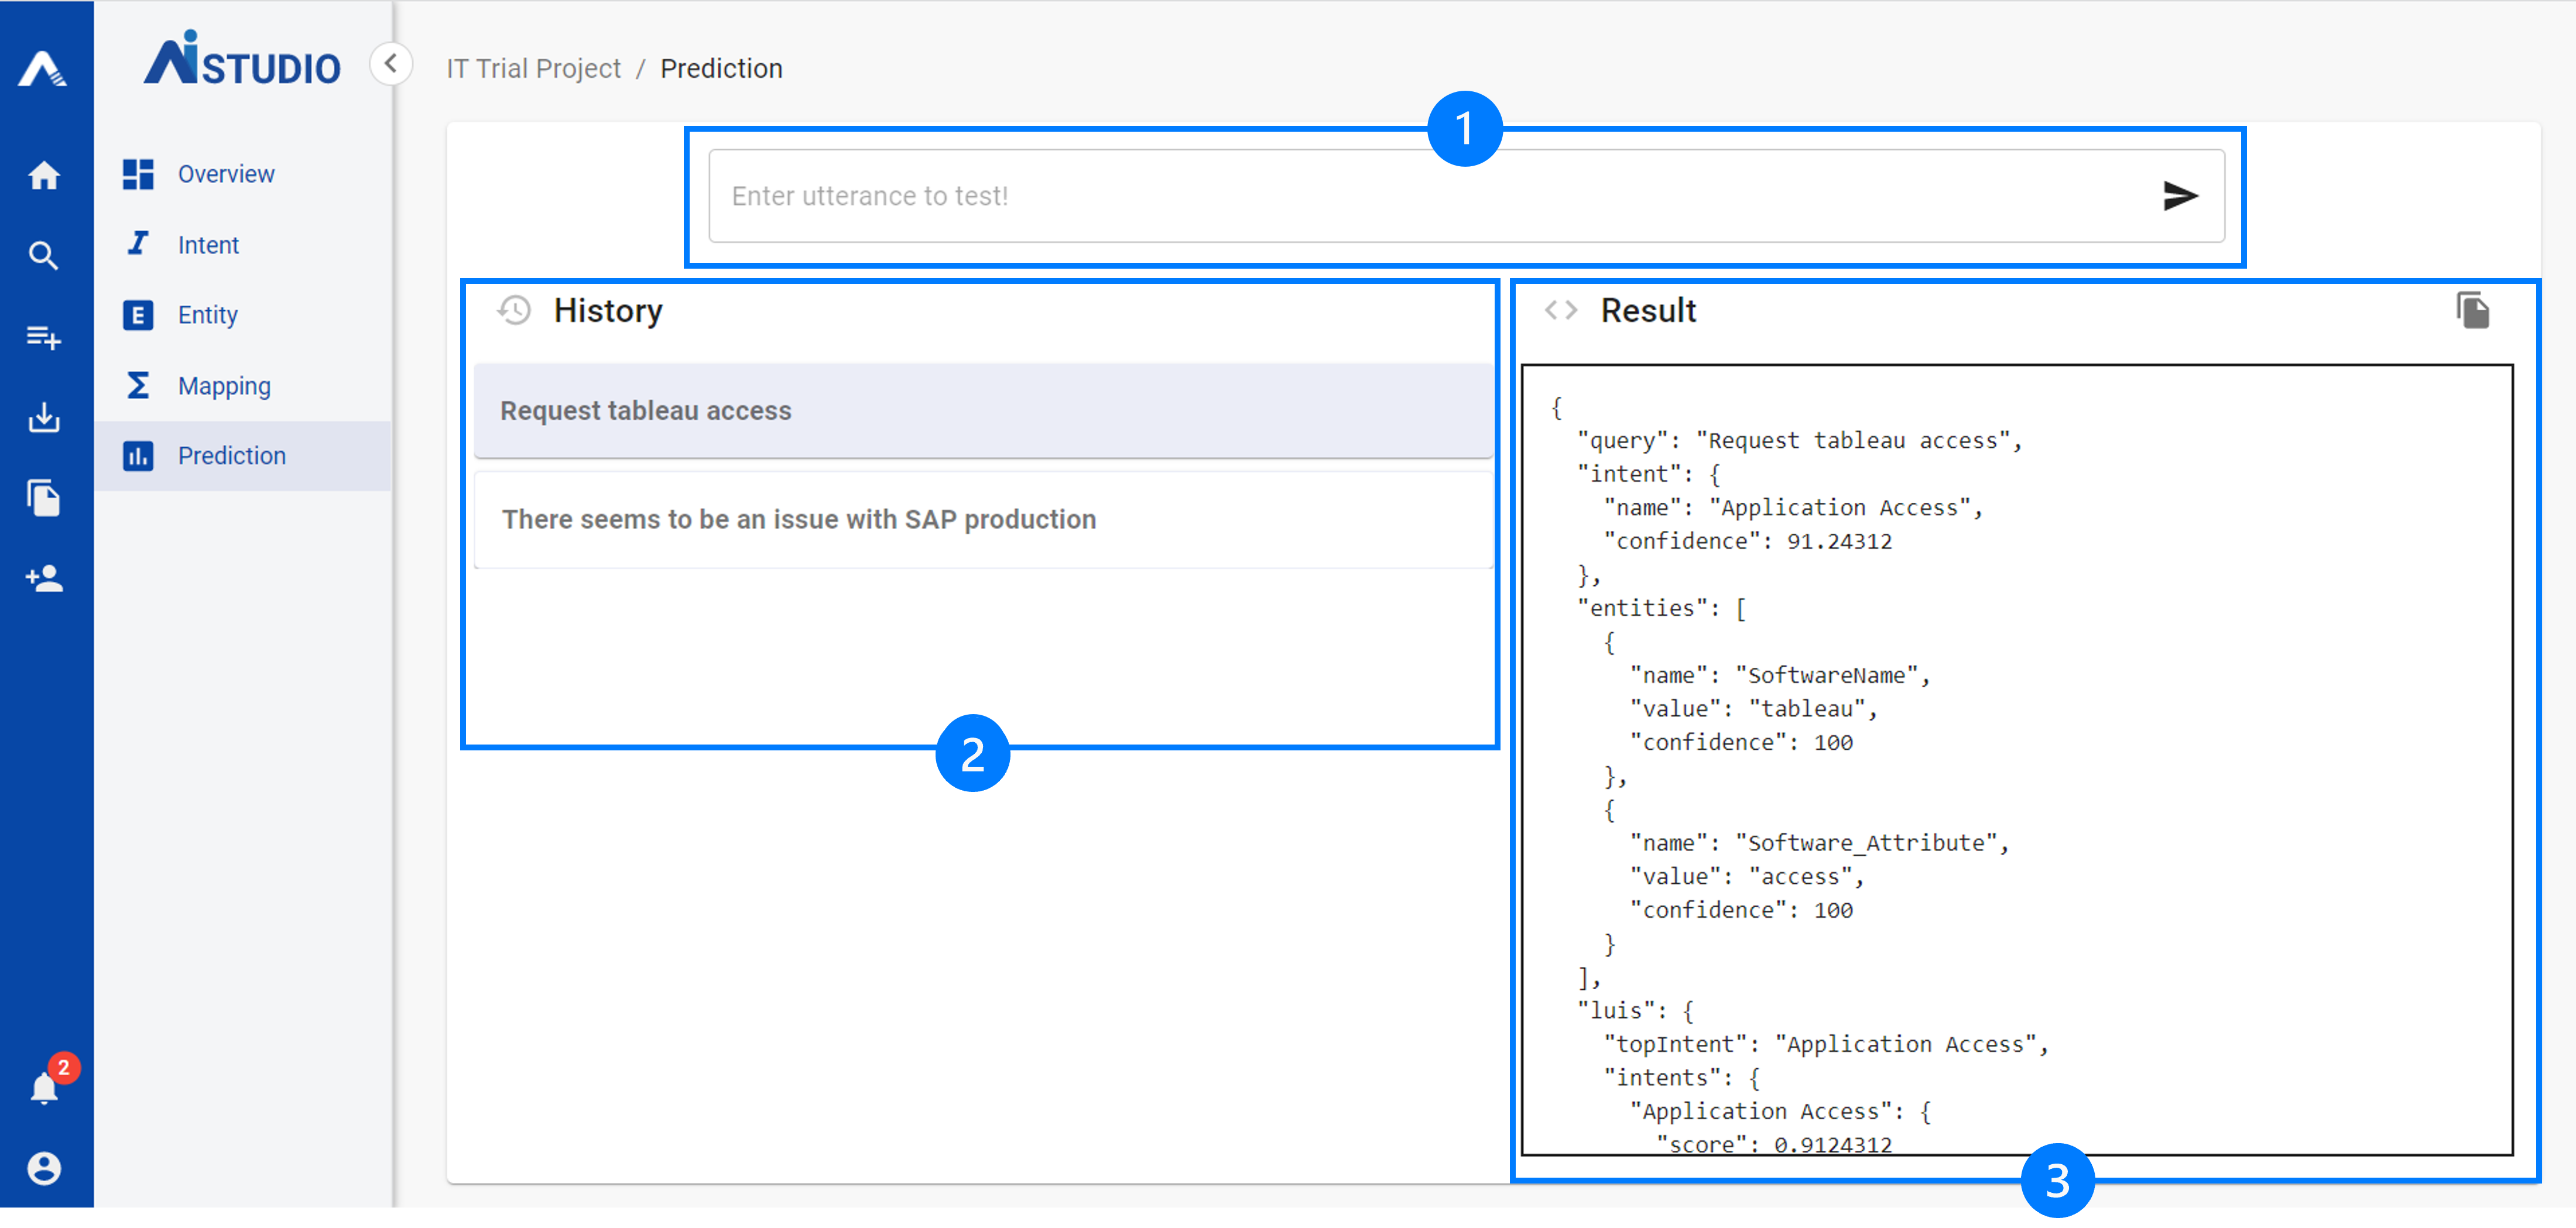
- Test Box: It is used to enter the utterances the user wants to test.
- History: It shows the last few tested utterances. Clicking on any of the utterances will show the result in the Result Box.
- Result Box: It shows the result of the entered utterance in JSON format. Users can copy this result JSON by clicking on the copy (
 ) icon in the top-right corner of the Result Box.
The following animated GIF shows a quick glimpse of how users can use the Prediction sub-menu.
- **Refresh:**It is used to refresh the page.